
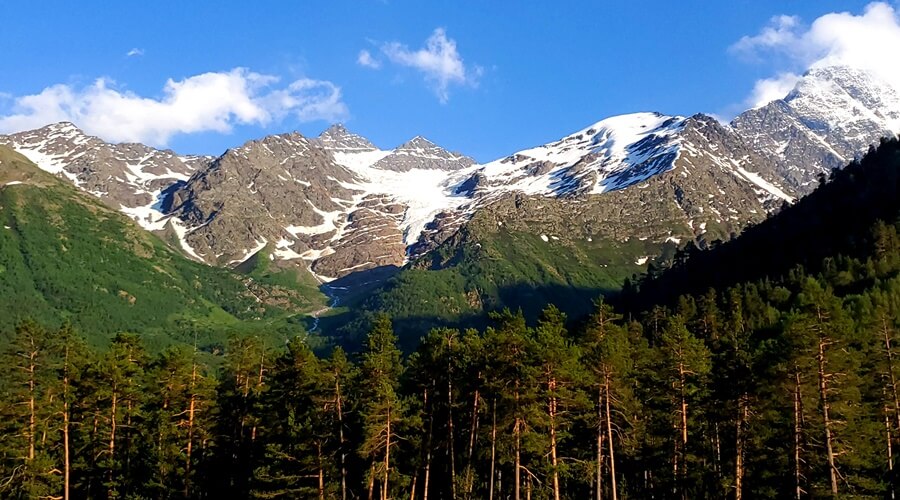
Mount Elbrus, the crown jewel of the Caucasus Mountain Range, is the highest peak in Europe, making it one of the coveted 7 summits. It is often the second of the Seven Summits attempted by climbers (Mt. Kilamanjaro in Africa being the first) and considered one of the “easiest”. A quick glance at any picture of the mountain, however, will quickly clue you in that the word “easy” in reference to one of the Seven Summits is a relative term. Note that in every picture the mountain appears to be covered in snow……pictures all taken during Russia’s infamously long and icy winters, right? No, even during the summer (when the lower elevation areas of the Caucasus Mountains reaches 95F or 40C), Mt. Elbrus is shrouded in snow and ice which flow off in glaciers down every side of the mountain.
Due to this, Elbrus is considered a “technical” climb, meaning that it requires the use of specialized climbing equipment to safely ascend. Some may argue that Elbrus’s South route, the “easiest” and most commonly climbed, should not be considered technical. I disagree. While in “technical terms” climbing the South route is about as simple as it gets, all the same, it requires special equipment and skills. But enough talk about terminology. The purpose of this article is to describe in detail exactly what climbing the South Route of Elbrus entails, especially highlighting the technical sections, so you can be as informed and prepared as possible before coming to Russia for your grand Elbrus adventure.
(A quick note on the structure of this article:: I will detail the route and its technical intricacies by breaking it into various phases including non-technical lower sections. If you just want the meat of the upper mountain, you can skip Phase 1.)
Phase 1: Azau to the Barrel Huts (Base Camp) – 2,400 to 3,800 meters (7,500 to 12,500 feet)
All South side Elbrus attempts begin in the village of Azau (2,400m/7,500ft). From here you have the option of either taking one of two cable car systems (the most popular options) or hiking on your own two feet to reach the Barrel Huts which will be your base camp for the next 4-5 days. All climbing operators’ standard groups take the cable car system to reach the barrel huts, but if you are thirsting for the extra challenge of climbing from the valley floor, this can be arranged in a private tour. All groups will first acclimatize Day 1-3 at Azau, doing hikes in the surrounding area, particularly on Elbrus’s neighbor Mt. Cheget.
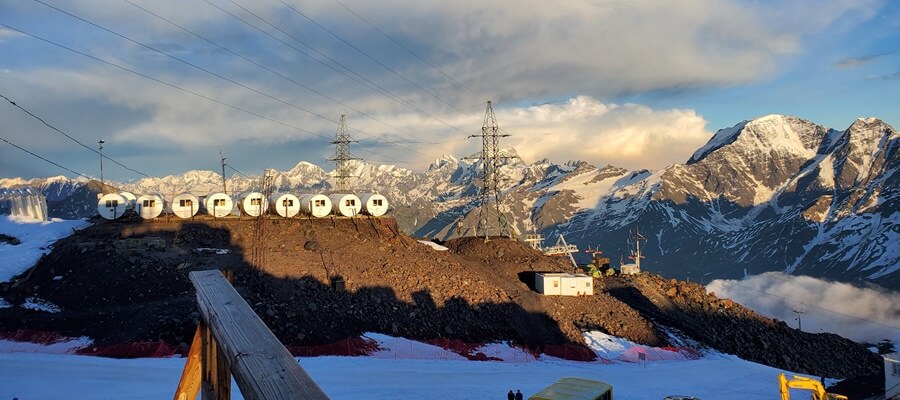
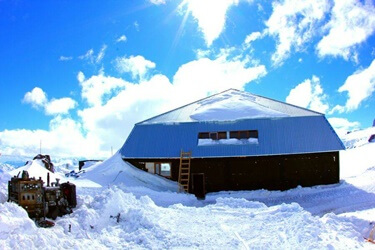
What are referred to as the Barrel Huts is actually base camp, where dozens of small shelter complexes, owned and operated by various different groups, are located. While the original shelters are indeed long cylindrical structures from the Soviet times, earning them the name “barrel huts”, most of the shelters are actually small rectangular metal buildings reminiscent of shipping containers. The area where the barrel huts are located begins at the upper end of the cable car system and continues for about 2 km (1.25 miles), and another 400 meters (1,300 ft) in elevation. Each complex of huts generally has sleeping quarters and a communal kitchen area. In recent years, nicer structures have been built, including the Heart of Elbrus Lodge and the Leaprus huts, fully equipped with WiFi and nice bathrooms.
Depending on the Barrel hut you have chosen, it may be more advantageous to take one cable car system over the other. The older (and more economic, though slower) system ascends via two gondolas to the level before Base Camp called Mir Station at 3450 meters (11,300 ft). This gondola typically leaves every 20 minutes on schedule. You won’t have quite reached the beginning of the barrel huts at Mir Station, but from here will ride a single person chairlift to the beginning of the Barrel Huts zone at 3600 meters (11,800 ft). If you have booked one of the lower Barrel Huts, then your journey is at an end with a short hike on rock if in July or August, or on snow at any other time of the year.
If you have booked into any of the higher Barrel huts, it’s likely more advantageous to take the new gondola which mirrors the ascent path of the old but adds a third gondola in place of the chair lift, up to Garabashi Station (3850 m/ 12,467 ft). The new gondola system is much nicer and is running on a constant loop all day, albeit with smaller cabins. The Heart of Elbrus Lodge is located just a few meters below Garabashi Station, so if this is base camp destination, your day’s journey will be over at this point! If your hut is still higher, you can continue hiking from here or hire a snowmobile to take you the rest of the way.
Phase 2: Barrel Huts to Pastukhov Rocks – 3,800 to 4,700 meters (12,500 to 15,420 feet)
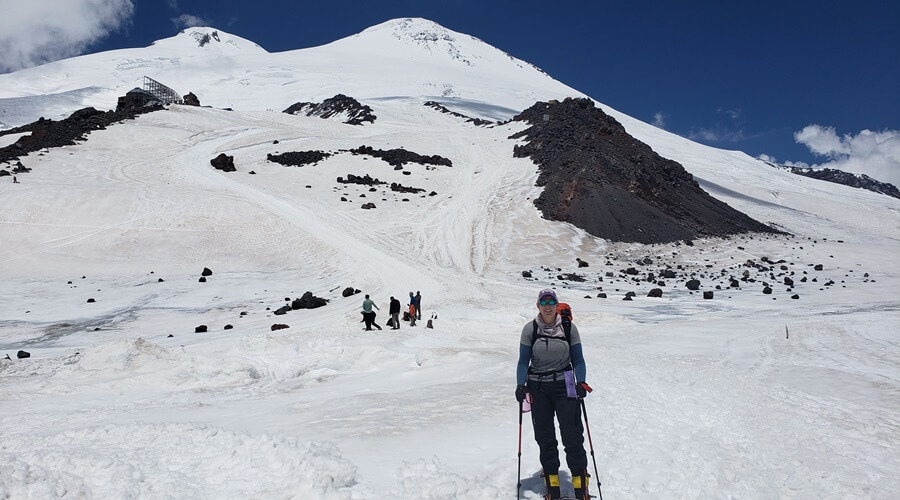
Depending on your acclimatization and ascent schedule, you will likely spend 4-5 days in your “barrel hut” lodging. The next leg of the route progresses directly North up the mountain over relatively flat and low-angle terrain, until you reach the elevation of the historic Priut 11 Hut, one of the first shelters on the mountain. Here the slope increases, though not enough to require crampons, except for in the iciest conditions. You will continue up this slope on a wide snowcat road that ascends between two long vertically-running rock ridges that guard the route from two of Elbrus’s massive glaciers on each side. You will follow the climbers’ right hand ridge as it ascends a little higher than the left hand side until it too disappears under the snow. Here most groups decide to stop and put on their crampons if they have not already, as the steepness of the slope ahead increases considerably.
You will continue up steeper slopes aided by crampons and trekking poles, until after a few minutes you will reach the bottom of Pastukhov Rocks (4,700 m/ 15,420 ft), a second rock ridge leading up the side of the mountain. This is the standard acclimatization hike climbers do to prepare for summit day. At the beginning of Pastukhov Rocks or at the end of the previous ridge, acclimatizing climbers will turn around and head back down to their lodgings for the night (typically on Day 4-5). On summit day most groups skip this section of the climb entirely by hiring a snowcat to take them to the beginning of Pastukhov Rocks, from where they begin their climb. We recommend this for most groups to maximize chance of summit day success (assuming you already climbed this portion during acclimatization), though the final decision remains with the group and their guide. When you leave your barrel hut on Summit day morning, you will be fully dressed to climb, having already donned all your layers as well as your harness and (if you are taking the snowcat) crampons. Be mentally prepared if you choose to take the snowcat, it may be much faster and easier, but it is also much colder!
Technical Gear Tip #1:Crampons – If you’ve never climbed a mountain with the elevation of Mt. Elbrus, you may not own a pair of mountaineering boots or crampons. Mountaineering boots (preferably double-layered) and crampons are a must for summiting this mountain, but have no fear, they are available to rent locally. This will save you from a big expense back home and give you more room and less weight to travel with on your way to Russia. Renting boots and crampons locally for your time at base camp should cost between $50-$70.
Phase 3: Pastukhov Rocks to the Saddle – 4,800 – 5,400 meters
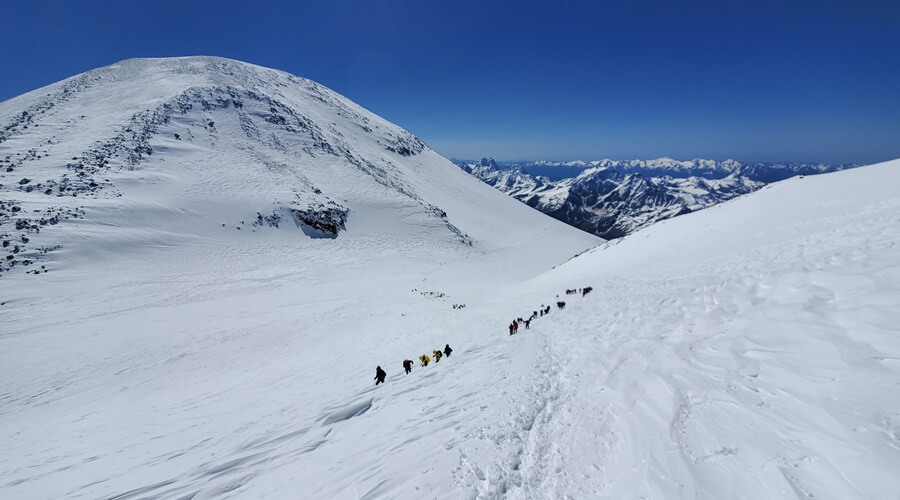
On summit day (typically Day 6-7), whether you decided to take a snowcat or to walk to Pastukhov rocks, you will complete the rest of the climb on foot (or perhaps skis). From the bottom of Pastukhov Rocks, you will proceed straight up the mountain alongside the rocks and then above them for about 700 m (2,300 ft). Crampons and trekking poles are the tools of choice with most teams choosing to zigzag up this steep vertical straight away in short caterpillar-type formations. There are always, however, those heroic few charging straight up the mountain. Most start in the dark and are well into this section of ascent before the sun rises, hiking into the dark morning by headlamp and moonlight. No ropes are required on this section of the climb and while a fall is certainly to be avoided, it would likely result in minimal injury. The slope, while steep, is easy to self-arrest on. All the same, best not to try your luck! Keep your eye out about 500 m (1,640 ft) above Pastukhov Rocks for a mostly-buried snowcat. This is a popular break location as it provides some of the only topography giving shelter from the wind on this portion of the route. (Fun side note, there is apparently a reward posted for the retrieval of this snowcat, to no avail so far!)
At about 5320 meters (17,450 ft) you will reach an area of the route known as the Traverse. Here the route begins hooking west to the climbers’ left, around the first and slightly shorter of Elbrus’s two summits. This portion of the route is usually a well-worn single track path in the snow (the exception to this being early and late season climbs where storms will sometimes obscure this track). Once again this portion of the climb requires only your crampons and trekking poles as you cross the Traverse, which ultimately brings you into the Saddle separating Elbrus’s summits. The Traverse actually crosses the top of one of Elbrus’s glaciers and is checked and reestablished each season to avoid crevasse hazard. Subsequently, it is very important to stay on the track, only stepping off a few feet, perhaps to let somebody pass. Wandering too far off the path, especially down slope, will place you on portions of the glaciers that have not been checked by guides, where crevasses may be present: hard to detect, but lying just beneath the surface. The slope beneath the fairly-level Traverse trail is steep and a fall in this portion of the route would be dangerous. The fall itself would likely not cause you any bodily harm, but you could easily slide far down on to the glacier into heavily-crevassed terrain that could be dangerous and difficult to climb out of safely.
Technical Gear Tip #2: Ice Axe – Every climber is required to climb Mt. Elbrus with ice axe on their person. They serve a dual purpose of giving you a hand-hold in the snow and of helping you stop yourself if you fall. If you join a group, your guide will do ice-axe training with you during the acclimatization process. You are not required to have prior ice axe experience in climbing Mt. Elbrus, so don’t let that bother you!
Phase 4: The Saddle to the Summit – 5,400 to 5,642 meters (17,700 – 18,510 feet)
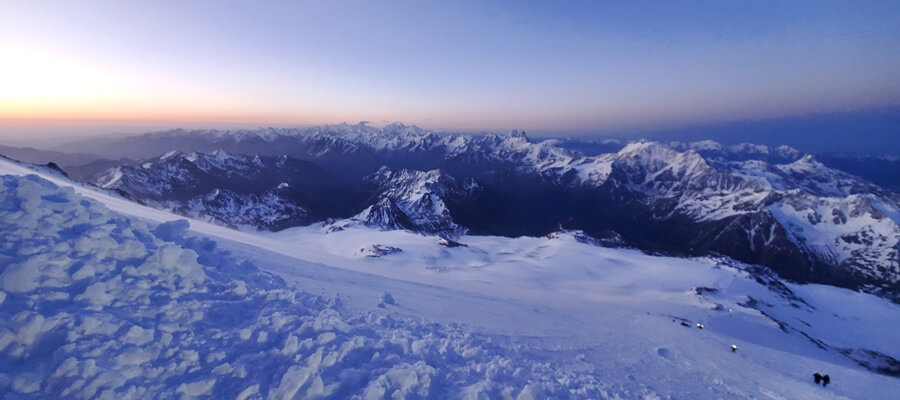
Upon finishing the Traverse, you will have arrived in the large Saddle that lies in between Elbrus’s twin summits. This is a good place to take a longer rest before making the push up the summit. In good weather, most groups drop their packs and trekking poles here and carry only their ice axes and perhaps a water bottle all the way to the summit.
Leaving the Saddle, you launch immediately into the steepest and most technical portion of the climb. For the next 200 meters (600 ft) or so you will move up along fixed lines (ropes anchored into the snow on each end using metal stakes called pickets) to which climbers attach themselves to by clipping into them with a carabiner connected to their harness by a short nylon “leash”. The climbing itself is very easy, only requiring the simplest crampon and ice axe technique. The fixed ropes are a safe-guard in the event of a fall, as the steep icy slope you are climbing up is difficult to self-arrest on, and runs into a rock band that is no respecter of persons.
The climbing here is easy but not trivial. A climber that forgoes use of the fixed lines certainly is exposing themselves to a higher risk of a dangerous and even fatal fall. Upon unclipping from the final fixed line, climbers crampon up one more gentle slope to reach the Summit plateau. Leading up to the summit lies a football field’s worth of gently undulating terrain. The summit itself sits just above the rest of the plateau by about 10 meters, and is accessed by a small snow ridge.
Technical Gear Tip #3: Fixed-Rope Climbing – As with crampons and ice axes, climbers are not required to have previous fixed-rope climbing experience to summit Mt. Elbrus.
Phase 5: Descent – Summit back to Base camp – 5,642 to 3,800 meters (18,510 to 12, 500 feet)
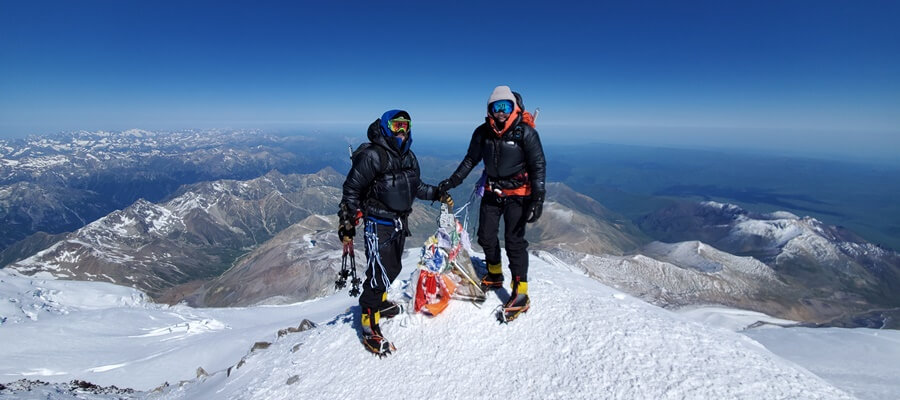
After catching your breath, celebrating your success and enjoying the spectacular view, you will turn around and descend the way you came up, to reach the barrels in 3-6 hrs. Don’t underestimate this part of the climb, as your body is naturally very tired and there is always a chance of late morning or afternoon storms rolling in unexpectedly. Stay close to your guide and group and you’ll be back in your hut before you know it. For those who are feeling extra tired from the ascent, there will likely be the option of riding a snowcat back to the huts from Pastukhov Rocks (optional and needs to be paid for in Russian rubles).
In summary, what does it take to safely climb this majestic mountain? More than anything, a climber who has physically prepared, is determined to push themselves, but also exercises good judgment, has every chance of successfully summiting Elbrus. The greatest difficulty of the climb is pushing yourself to keep climbing, even when the altitude makes walking feel like sprinting and your legs and lungs burn with every upward step. The technical portions are more than manageable, especially with an experienced guide at your side to help. Of course, if at any part of the climb fatigue or the effects of altitude begin to impair your judgement or ability to move in a controlled manner, you should descend and leave the mountain for another day. This happens even to the best of us and as the old mountaineering adage goes… “the summit is optional, returning home is mandatory.”
About the Author: Camilo Gomez is an experienced mountaineer, with successful summits of 14,000+ ft. mountains in Russia, Mexico, and Colorado. He is a certified ski, mountain, and rock climbing guide. Special thanks to Janelle Routhier for providing many of the pictures in this article. You can follow her mountain climbing adventures on her website or Instagram handle @jayewalking.the.world .